Navigation
Introduction
Starting with HW2 and Lab2, you'll need to have your computer setup to use the Spring 2015 Java libraries.
To download the files, all you need to do is pull from the skeleton repository. You should see a directory appear in your directory called lib, containing the following files:
- algs4-package.jar
- algs4.jar
- checkstyle-5.9-all.jar
- hamcrest-core-1.3.jar
- jh61b.jar
- junit-4.12.jar
- stdlib-package.jar
- stdlib.jar
A. Windows Setup
- Pull from the skeleton repo and verify that you've received a lib folder containing the jar files listed above.
Create a CLASSPATH environment variable pointing to the lib folder. As we did in Lab 1b, we will do this by updating our environment variables.
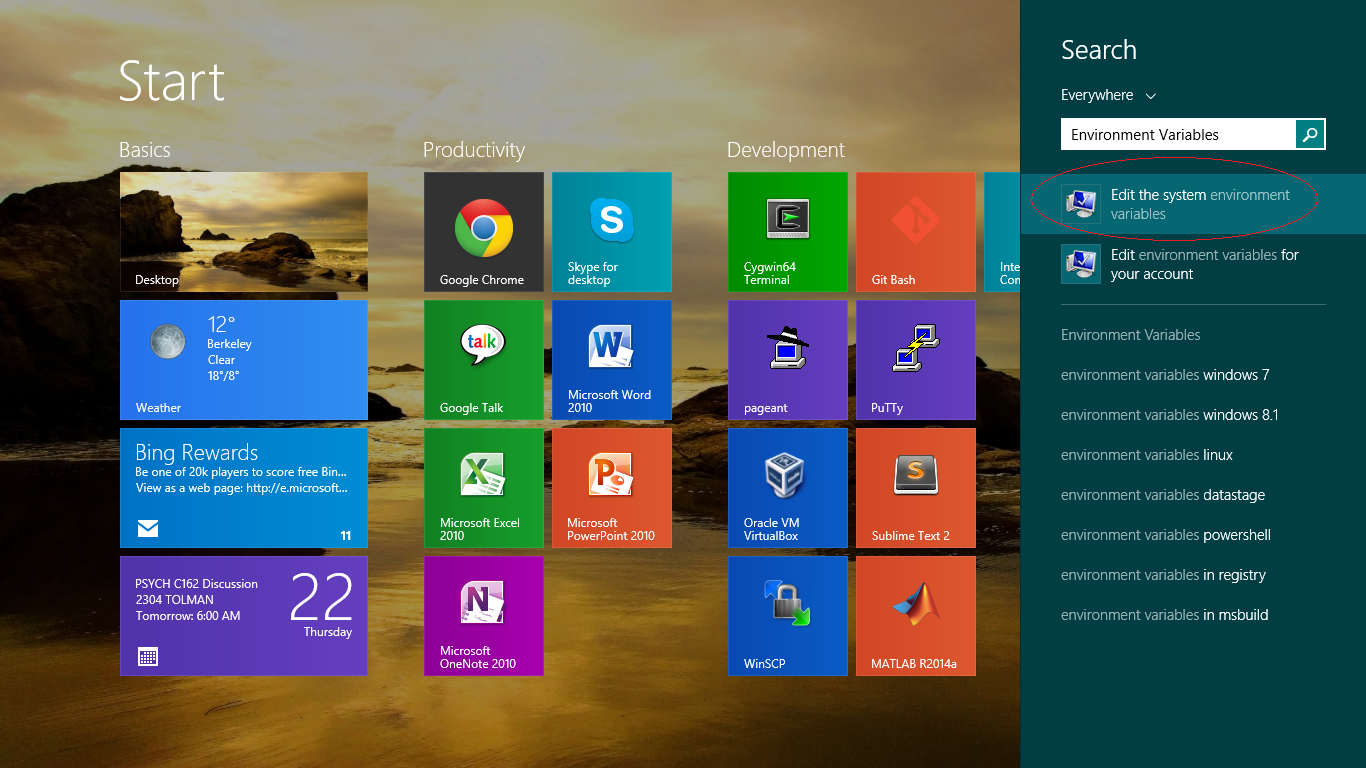
Windows 8/8.1: Launch the Start Screen by pressing Windows, and type 'Environment Variables'. Select "Edit the system environment variables".
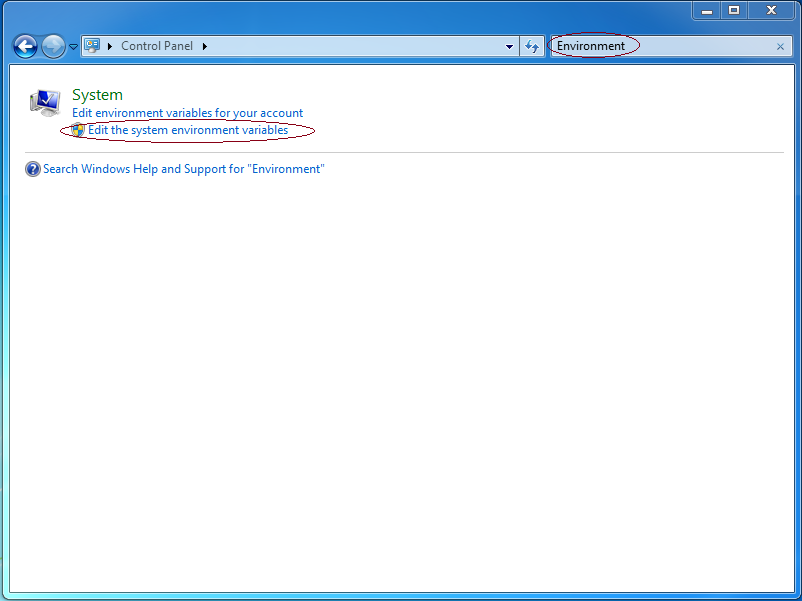
Windows 7 and earlier: Open the Start Menu and launch the "Control Panel". Search for "Environment Variables", and select "Edit the system environment variables".
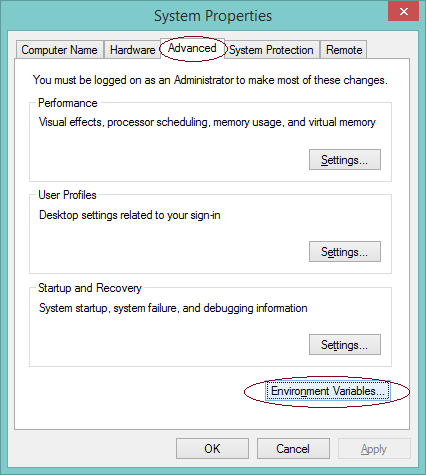
Navigate to the "Advanced" tab, and click "Environment Variables...".
Under "System variables", click "New..."
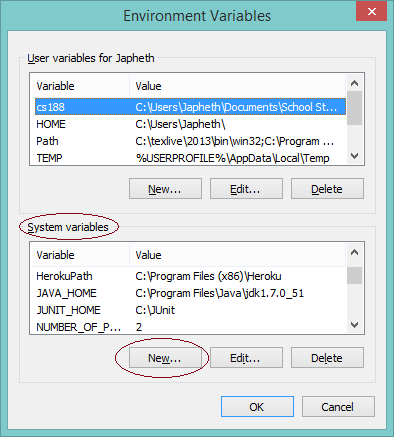
Define the following variables — if the variable already exists, select the variable and click "Edit...", then add the value specified below to the front of the value, followed by a semicolon; otherwise, click "New..." and use the values specified below as the value of the variable:
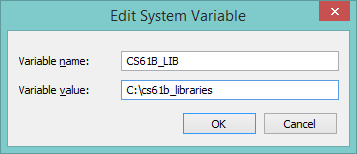
CS61B_LIB: Set this to the location which contains your library JAR files (e.g. stdlib-package.jar). This is the location you specified in step 1. In my case, I have specified the location
C:\cs61b_libraries. Since you downloaded the libraries using git, your directory will probably be something more likeC:\users\potato\61b\bxz\lib.Warning: If the path to the above directory contains space(s), you will need to surround the Variable value with double quotes, i.e. `"C:\Some Path With Spaces".
- CLASSPATH: Set this to
%CLASSPATH%;%CS61B_LIB%\*;.;
- Press OK to save these settings, and OK again to close the dialog for System Properties. Restart any open Git Bash/Command Prompt/Cygwin windows that you have open and you should be good to go. To verify that your setup works, try compiling the ArithmeticTest.java file from lab2. If this file compiles, everything is working as expected.
B. OS X and Unix Setup
- Pull from the skeleton repo and verify that you've received a lib folder containing the jar files listed above.
Set up a CLASSPATH environment variable that points to the folder containing the jar files. To do this:
Open the file .bashrc in your home directory. Since the filename starts with a period, it counts as a "hidden file", and will not appear in your finder window. Annoyingly, there is no "show hidden files" option in Mac OS X, so I recommend opening this file by creating a terminal window and entering the command
pico .bashrc. This will open the pico editor, which is fairly easy to use (compared to vim or emacs).
- Scroll to the bottom of your .bashrc file. If it is empty, this is fine. It just means that you didn't have one yet. At the bottom of your .bashrc file, add something similar to
export CS61B_LIB_DIR="/Users/jug/work/61b/bqd/lib/*", but with the directory name adjusted to match the location of the jar files on your computer. This creates an environment variable calledCS61B_LIB_DIR. - Now add a line to the bottom of your .bashrc file that says
export CLASSPATH="$CLASSPATH:$CS61B_LIB_DIR:./". This creates an environment variable called CLASSPATH. Everytime you use javac, it will look in the directories given by the CLASSPATH for library files (you do not need to manually import libraries in Java code). - Press Ctrl-O to save. Then press Ctrl-X to exit pico.
- Open the .bash_profile file in your home directory. Add the exact same two lines of code to this file.
- Restart any terminal windows you have open.
- Open a new terminal window and verify that your code is working by using javac on
ArithmeticTest.javafrom lab2. If this works, then your computer is properly configured.
Note: For Unix users, you might need to tweak these steps slightly if you're using a different shell than Bash. If you don't know what that means, then these directions should almost certainly work (but have not been tested).
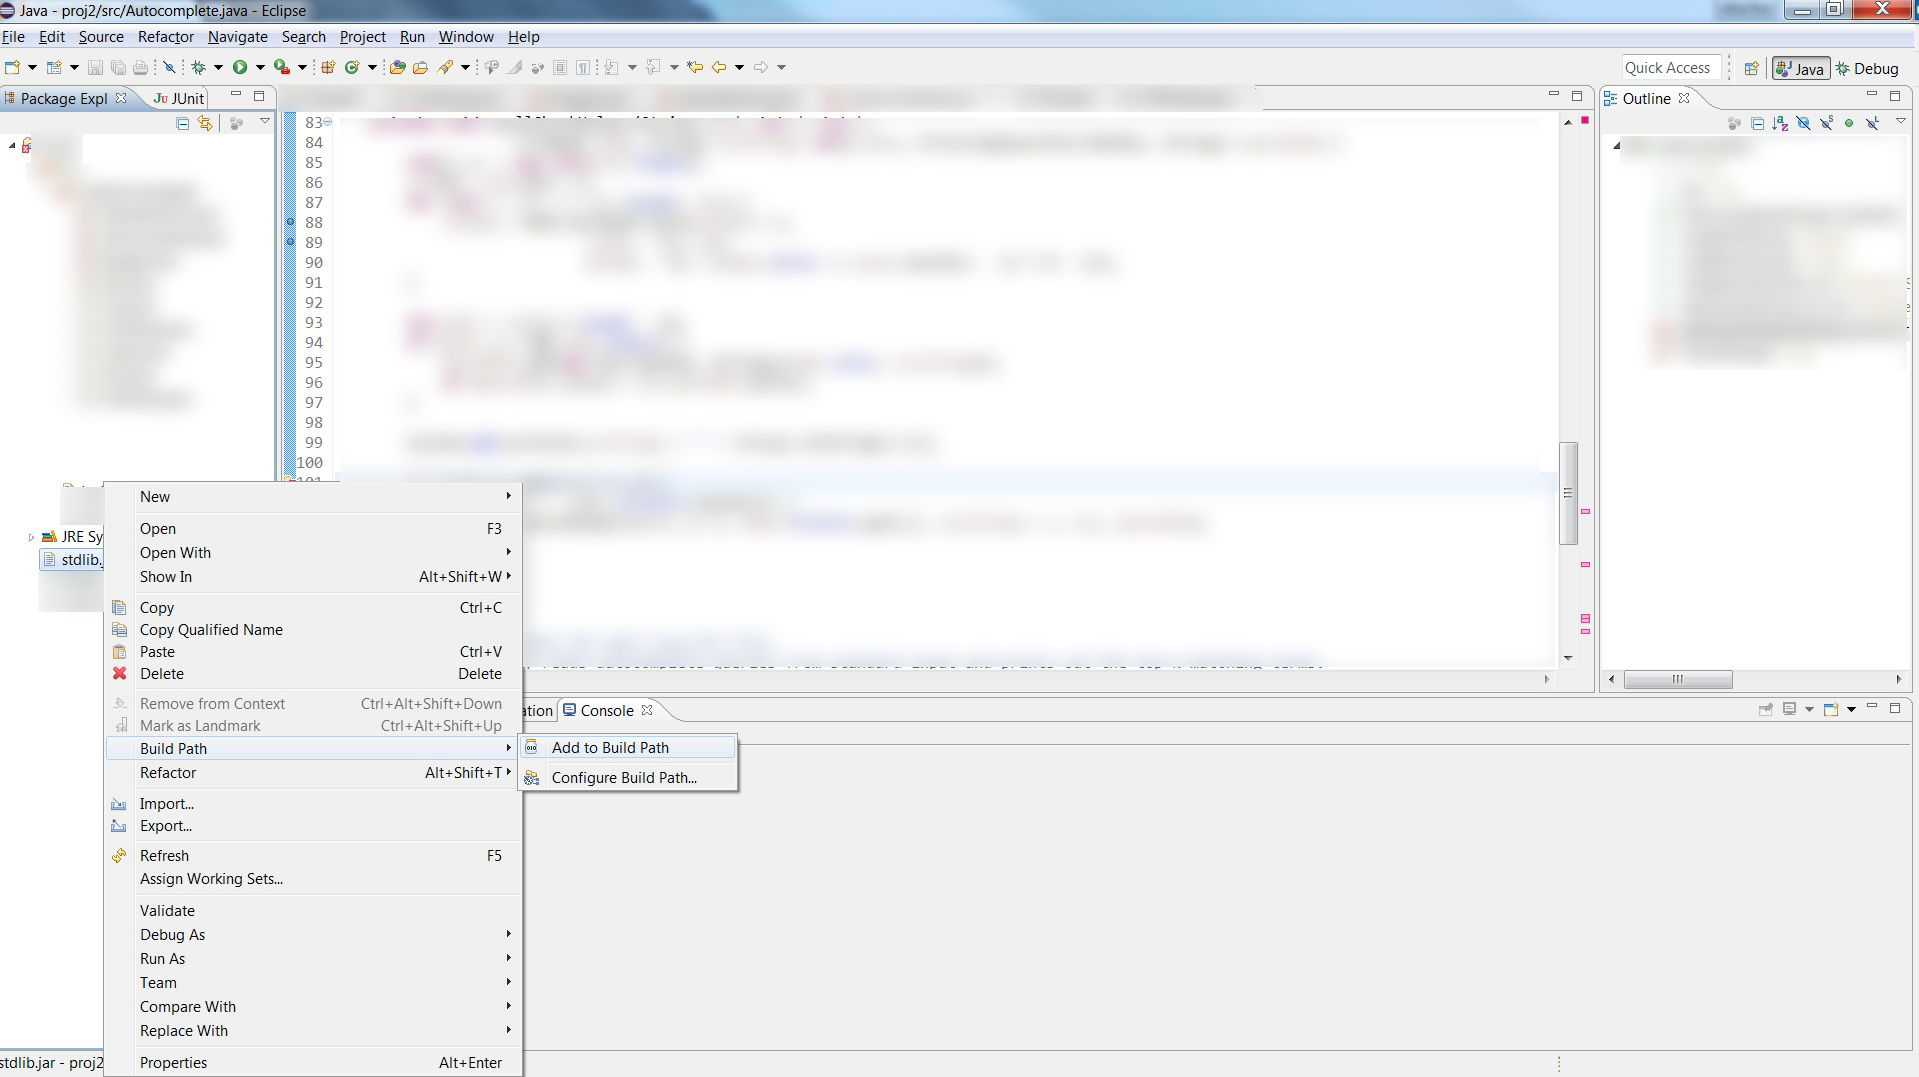
C. Eclipse Setup
Note: Directions are terse as we do not provide official support for Eclipse. Some (but not all) staff members will be able to help if you run into trouble.
- Move all of your .jar files to the base directory of your eclipse project.
- Right click it and select "add to build path".