Navigation
- Introduction
- Getting the Skeleton Files
- Understanding the Physics
- Starting the Planet class
- Completing the Planet class
- Universe File Format
- Getting Started with the Simulator
- Drawing the Initial Universe
- Creating an Animation
- Printing the Universe
- Running the Simulation
- Getting to Know You
- Submission
A heads up before you even read the introduction: We've built a huge amount of new infrastructure and new assignments this semester and you are the first cadre of people going through this new 61B curriculum. We apologize in advance for the occasional headaches (particularly with git). It gits better (git it, ha ha?)
Please report any errors directly to Josh at hug@cs.berkeley.edu.
Update: 1/24/2015, 7:20 AM: The release tests have been updated to be less picky. If you were having problems like "5.3360000000000004E-11 not equal to 5.336E-11", pull the skeleton files again, and your TestXXXXX files will be updated so that they are friendlier about double comparisons.
Introduction
Before starting this homework, we are assuming that you have watched lecture 2 and (ideally) have also completed HW0. If you have not watched lecture 2, do so now. Note that code is available on the website that you can experiment with. You do not need to fully understand the contents of lecture 2 to begin this assignment. Indeed, the main purpose of this assignment is to help you build some comfort with the material in that lecture.
Unlike later HWs, this assignment has a great deal of scaffolding. Future assignments will require significantly more independence.
Your goal is to write a program simulating the motion of N objects in a plane, accounting for the gravitational forces mutually affecting each object as demonstrated by Sir Issac Newton's Law of Universal Gravitation.
Specifically, you will be writing a program NBody.java that:
- Reads in three command line arguments, where the first two provide information on the timing of the simulation, and the third is a file name for a file containing data about the objects to be simulated. More details below.
- Reads in the universe from the specified text file, using the
Inclass, storing each object read in as an instance of aPlanetclass. - Simulates the universe according to the command line arguments, animating the results using
StdDraw. - Prints the state of the universe at the end of the simulation (in the same format as the input file) using
StdOutorSystem.out.
Getting the Skeleton Files
Before doing anything, make sure you are back on your master branch.
To do this, head to the folder containing your copy of your repository. For example, if your login is 'agz', then head to the 'agz' folder (or any subdirectory). Then use the git branch command, which will tell you which branch you are on (as described in the git guide).
If you have not read through the git guide and done the exercises, you should do so ASAP, though it is not strictly necessary to complete this homework.
For example:
$ cd ~/agz
$ git branch
    * ag/lab1
    master
The output above tells us that we are still on the ag/lab1 branch. You do not want to be on this branch, otherwise, you will be submitting your hw1 solution to the lab1 autograder and it will get confused and sad.
To switch branches, use the git checkout master command, and verify that you've switched branches as shown below:
$ git checkout master
$ git branch
    ag/lab1
    * master
Now make sure you have the latest copy of the skeleton files with by using git pull skeleton master. Since you already have a copy of the repository you're pulling, this will cause a merge (as described in the lab guide). A text editor will automatically open asking you to provide a message on why you are merging.
Depending on what computer you're using, you will possibly yourself in one of two obtuse text editors:
- vim
- emacs
Both of these editors are designed with the power user in mind, with no regard for those stumbling into them by accident. Unfortunately, git will likely default to one of these text editors, meaning that the simple act of providing a merge message may cause you considerable consternation. Don't worry, this is normal! One of the goals of 61B is to teach you to handle these sorts of humps. Indeed, one of the goals of using git this semester was to have you hit these common hurdles now in a friendly pedagogical environment instead of the terrifying real world. However, this also means we're going to suffer sometimes, particularly at this early point in the semester. Don't panic!
For reference, this is what vim looks like:
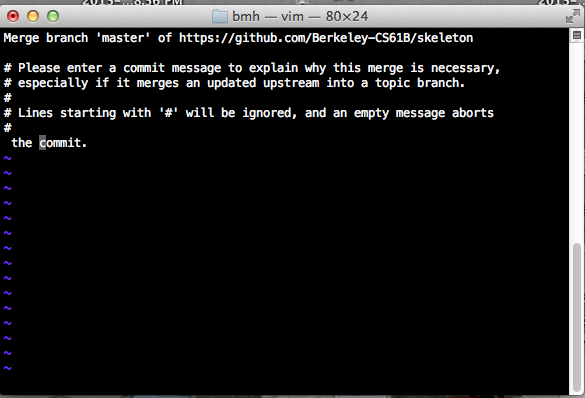
See this link if you are stuck in vim. If you are in emacs, type something and then press ctrl-x then ctrl-s to save, then ctrl-x then ctrl-c to exit.
Once you've successfully merged, you should see a hw1 directory appear with files that match the skeleton repostiory.
If you get some sort of error, STOP and either figure it out by working through the git guide or seek help. You'll potentially save yourself a lot of trouble this way.
The Planet Class and its Constructor
You'll start by creating a Planet class. In your favorite text editor, create a file called Planet.java. If you haven't picked a text editor, I recommend Sublime Text. Remember that your .java files should have the same name as the class it contains.
All planets will have 6 values stored as instance variables. Those are:
- Its current x position (x)
- Its current y position (y)
- Its current velocity in the x direction (xVelocity)
- Its current velocity in the y direction (yVelocity)
- Its mass (mass)
- The name of the image in the
imagesdirectory that it is associated with (img)
Your instance varaibles must be named exactly as above. Start by adding in a constructor that takes in 6 arguments and intializes an instance of the Planet class. The signature of the constructor should be:
public Planet(double ??, double ??, double ??,
              double ??, double ??, String ??)
Warning, do not give your parameter names the same name as these instance variables. If you insist on doing so for aesthetic reasons, make sure to use the this keyword appropriately (mentioned only briefly in lecture and not at all in HFJ).
All of the numbers for this homework will be doubles. We'll go over what exactly a double is later in the course, but for now, think of it is a real number, e.g. double x = 3.5. In addition, all instance variables and methods will be declared using the public keyword.
Once you have filled in the constructor, you can test it out by compiling your Planet.java file and the TestPlanetConstructor.java file we have provided.
You can compile with the command:
javac Planet.java TestPlanetConstructor.javaYou can run our provided test with the command
java TestPlanetConstructorIf you pass this test, you're ready to move on to the next step. Do not proceed until you have passed this test.
Understanding the Physics
Let's take a step back now and look at the physics behind our simulations. Our Planet objects will obey the laws of physics. In particular, they will be subject to:
Pairwise Force: Newton's law of universal gravitation asserts that the strength of the gravitational force between two particles is given by the product of their masses divided by the square of the distance between them, scaled by the gravitational constant G (6.67 * 10-11 N-m2 / kg2). The pull of one particle towards another acts on the line between them. Since we are using Cartesian coordinates to represent the position of a particle, it is convenient to break up the force into its x- and y-components (Fx, Fy). The relevant equations:
- F = G * m1 * m2 / r2
- r2 = dx2 + dy2
- Fy = F * dy / r
- Fx = F * dx / r
Note that force is a vector (i.e., it has direction). In particular, be aware that dx and dy are signed (positive or negative).
- Net Force: The principle of superposition says that the net force acting on a particle in the x- or y-direction is the sum of the pairwise forces acting on the particle in that direction.
In addition, all planets have:
Acceleration: Newton's second law of motion says that the accelerations in the x- and y-directions are given by:
- ax = Fx / m
- ay = Fy / m
Starting the Planet Class
Now that you know what Planets actually do, let's add methods to the Planet class.
calcDistance
Start by adding a method called calcDistance that calculates the distance between two Planets. This method will take in a Planet and should return a double. Once you have done so, go ahead and recompile and run the next unit test.
Compile with:
javac Planet.java TestCalcDistance.javaand run with
java TestCalcDistanceHint: In Java, there is no built in operator that does squaring or exponentiation in Java. We recommend simply multiplying a symbol by itself instead of using Math.pow, which will result in slower code.
calcPairwiseForce
The next method that you will fill out will be calcPairwiseForce. This method will also take in a Planet and return a double. You should be calling the calcDistance method in this method.
Once you've finished calcPairwiseForce, re-compile and run the next unit test.
javac Planet.java TestCalcPairwiseForce.java
java TestCalcPairwiseForce
calcPairwiseForceX and calcPairwiseForceY
The next two methods that you should write are calcPairwiseForceX and calcPairwiseForceY. This is very similar to the previous part that you've just finished. Once you've finished, you can recompile and run the next unit test.
javac Planet.java TestCalcPairwiseForceXY.java
java TestCalcPairwiseForceXY
setNetForce
This method will calculate the net force that is being exerted on a planet. This is a void method. setNetForce will take in an array of Planet objects and update the Planet's net force to match the total amount of force exerted by those planets on the current planet. You will need to iterate over the array in order to calculate the netForce. However, there is one caveat. If the currect Planet that you accessed in the array is the same Planet object as this, then you should NOT try and add to netForce. Can you think of why that is the case (hint: the universal will possibly collapse in on itself, destroying everything including you)?
When you are done go ahead and run:
javac Planet.java TestSetNetForce.java
java TestSetNetForce
If you're tired of the verbosity of for loops, you might consider reading about less verbose looping constructs (for and the 'enahnced for') given on page 114-116 of HFJ. This is not necessary to complete the homework.
draw
We also want a planet to be able to draw itself at its appropriate position. Create a method draw with type void that takes in no parameters. It should draw the planet to the x, y coordinate specified.
To fill out this method, you'll need to check out the StdDraw API from the Princeton Standard Library.
Completing the Planet Class
Now that we have the methods in the Planet class that can simulate the physics, let's take a step back and see how these methods will play together.
To create our simulation, we will discretize time (please do not mention this to Stephen Hawking). The idea is that at every discrete interval, we will be doing our calculations and once we have done our calculations for that time step, we will then update the values of our Planets and then redraw the universe.
We'll use the algorithm below to update the positions and velocities of the planets.
- For each planet, set the net force.
- Calculate and set the acceleration using the net force computed in Step 1.
- Calculate and set the new velocity by using the acceleration and current velocity. The new velocity is vx + dt * ax, vy + dt * ay), where dt is the length between time intervals. (You'll see this when we get to NBody.java)
- Calculate and set the new position by using the velocity computed in step 3 and the current position. The new position is (px + dt * vx, py + dt * vy).
update
Add a method called update to the Planet class. update is a void method and will take in just one double parameter which you should call dt. It should perform the last three steps of the process described above (i.e. the update method assumes that the net force has already been set).
Once you're done, recompile and test your method with:
javac Planet.java TestUpdate.java
java TestUpdate
Once you've done this, your planet class is complete. Hoorah! You're halfway there.
(Optional) Testing Your Planet
As the semester preogresses, we'll be giving you less and less tests, and it will be your responsibility to write your own tests. Writing tests is a good way to improve your workflow and be more efficient. That is not to say that you should always test everything and anything, but whenever it is appropriate.
Go ahead and try writing your own test for the Planet class. Make a TestPlanet.java file and write a test that creates two planets and prints out the pairwise force between them. We will not be grading this part of the assignment.
Universe File Format
Before we start writing the simulator, it'd be a good idea to know the file format that stores the state of the universe. The input format is a text file that contains the information for a particular universe (in SI units). The first value is an integer N which represents the number of planets. The second value is a real number R which represents the radius of the universe, used to determine the scaling of the drawing window. Finally, there are N rows, and each row contains 6 values. The first two values are the x- and y-coordinates of the initial position; the next pair of values are the x- and y-components of the initial velocity; the fifth value is the mass; the last value is a String that is the name of an image file used to display the planets. Image files can be found in the images directory. As an example, planets.txt contains data for our own solar system (up to Mars):
$ more planets.txt
5
2.50e+11
 1.4960e+11  0.0000e+00  0.0000e+00  2.9800e+04  5.9740e+24    earth.gif
 2.2790e+11  0.0000e+00  0.0000e+00  2.4100e+04  6.4190e+23     mars.gif
 5.7900e+10  0.0000e+00  0.0000e+00  4.7900e+04  3.3020e+23  mercury.gif
 0.0000e+00  0.0000e+00  0.0000e+00  0.0000e+00  1.9890e+30      sun.gif
 1.0820e+11  0.0000e+00  0.0000e+00  3.5000e+04  4.8690e+24    venus.gif
Don't write any code for reading in this file yet. This section is just an example of the file format.
Getting Started with the Simulator (NBody.java)
NBody is a class that will actually run your simulation. This class will have NO constructor. Instead, most of the work will be done in the main method.
Create an NBody.java file. Create a main method in the NBody class. Write code so that your NBody class performs the following steps:
- Store the 0th and 1st command line arguments as doubles named
Tanddt. - Store the 2nd command line argument as a String named
filename. - Create a new instance of the In class using the
filename. See the code examples from lecture 2 or the Princeton Standard Library documentation. - Read in the number of planets and the universe radius from the file. You will find
readInt()andreadDouble()useful.
There is no automated testing for this part. You will need to convince yourself that your code works.
getPlanet
Before we proceed with drawing anything, we'll add a helper method to the NBody class. This method will have to be static.
Make a new static method getPlanet that takes an In object as an argument, and reads from it the information for the next Planet object. It will then instantiate that Planet and return it. Do not hesitate to ask for help if you are stuck here.
Once you've written getPlanet, you can compile NBody.java and run our test for the getPlanet method as follows:
javac NBody.java Planet.java TestGetPlanet.java
java TestGetPlanet
Note that getPlanet will NOT work on an In unless the In has already had its number of planets and universe radius read.
Drawing the Initial Universe State
Let's head back to the main method. Add code so that after reading in the number of planets and the size of the universe, your main method does the following:
- Read all the planets into an array of the appropriate size.
- Set the scale of the universe. You will need to see the StdDraw documentation for how to do this.
- Draw the initial state of the universe. First draw the image
starfield.jpgand then draw all the planets in their appropriate locations (using the draw method of each individual planet in your array).
Test that your main method works with the following command:
java NBody 157788000.0 25000.0 data/planets.txtYou should see the sun and four planets sitting motionless. You are almost done.
Creating an animation
Everything you've done so far is leading up to this moment. With only a bit more code, we'll get something very cool. Finish your main method by adding the following:
- Create a time variable and set it to 0. Set up a loop to loop until this time variable is T.
For each time through the loop, do the following:
- Set the current net force for each planet.
- Call update on each planet.
- Draw the background image.
- Draw all of the planets.
- Pause the animation for 10 milliseconds (see the
showmethod of StdDraw). You may need to tweak this on your computer. - Increase your time variable by dt.
Adding Audio
(Optional) For a finishing touch, play the theme to 2001: A Space Odyssey using StdAudio and the file 2001.mid. Feel free to add your own audio files and create your own soundtrack!s
Running the Simulation
To compile your program, type in your command line:
javac NBody.java
To execute your program, you will need to include three command line arguments For example:
java NBody 157788000.0 25000.0 data/planets.txt
Make sure to also try out some of the other simulations, which can all be found in the data directory. Some of them are very cool.
Printing the Universe
When the simulation is over, i.e. when you've reached time T, you should print out the final state of the universe in the same format as the input, e.g.:
5
2.50e11
 1.4925e+11 -1.0467e+10  2.0872e+03  2.9723e+04  5.9740e+24    earth.gif
-1.1055e+11 -1.9868e+11  2.1060e+04 -1.1827e+04  6.4190e+23     mars.gif
-1.1708e+10 -5.7384e+10  4.6276e+04 -9.9541e+03  3.3020e+23  mercury.gif
 2.1709e+05  3.0029e+07  4.5087e-02  5.1823e-02  1.9890e+30      sun.gif
 6.9283e+10  8.2658e+10 -2.6894e+04  2.2585e+04  4.8690e+24    venus.gif
You are welcome to try to figure this out on your own, but if you'd prefer not to, you can find a solution in the hw hints.
This isn't all that exciting, but we'll need this information to autograde your assignment.
Getting to Know You
We want to get to know you guys better! So, for the last part this assignment, please fill out this form here.
You will need to include a picture of yourself in the HW1 directory when you push it up to Github. After you do so, you can get the URL to put in the form.
Submission
To recieve feedback from the autograder via email, push to the ag/hw1 branch, following the directions from lab 1.
Exta for Experts
There are a number of interesting possiblities:
- Creating your own universe files.
- Support elastic (or inelastic) collisions.
- Add the ability to programatically generate planet images (rather than relying on input image files).
- Add the ability to control a spacecraft that is subject to the gravitational forces of the objects in the solar system. Try flying from one planet to another.
If you decide to implement anything extra, you should make another copy of your project in a subdirectory of your project called 'extra'. Don't add new methods to the files that you submit, otherwise the autograder will get perturbed. After the deadline, feel free to share your creations on Piazza or elsewhere.
Acknowledgements: This assignment was adapted from an assignment created by Robert Sedgewick and Kevin Wayne from Princeton University.